Blog
How to convert a model from C4D to OBJ?
When working with 3D models, it’s essential to convert them between different formats to ensure compatibility across various programs and platforms. One prevalent format for 3D graphics work is Cinema 4D (C4D), renowned for its robust tools for crafting high-quality models and animations. Personally, I predominantly utilize Cinema 4D for most of my modeling tasks.
However, despite the capabilities of C4D as a modeling tool, there are instances where other formats, such as Wavefront OBJ (Object) and Autodesk FBX (Filmbox), become necessary, particularly when collaborating with different applications or platforms.
In this article, we will delve into the process of converting models from C4D to OBJ format using the example of my terrain models.
PREPARING THE MODEL FOR EXPORT
- Open the model in Cinema 4D: Begin by launching the Cinema 4D program and opening the desired model for conversion.
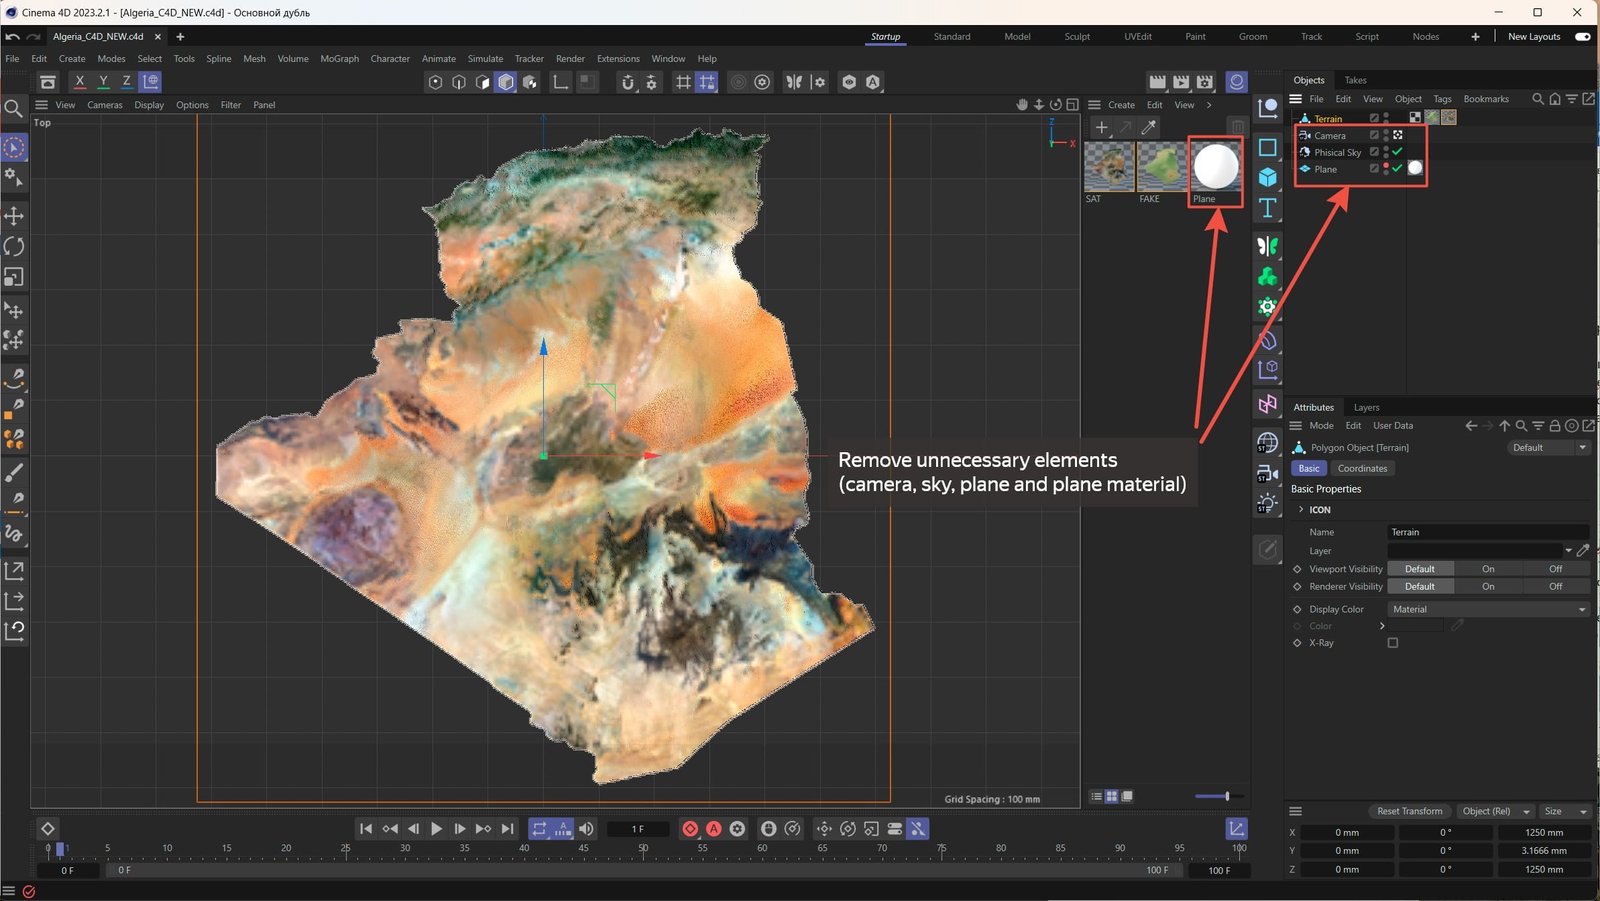
- Clean up the scene: Within C4D files, aside from the mesh, there may exist additional objects such as cameras, sky elements, lighting setups, and auxiliary planes. To streamline the export process and eliminate superfluous details from the final OBJ file, it is advisable to remove unnecessary objects from the scene, retaining solely the polygonal mesh and associated materials applied to the model.
EXPORT TO OBJ FORMAT
Exporting a model from Cinema 4D to OBJ (Wavefront OBJ) format facilitates the preservation of the object’s geometry, textures, and materials, enabling their utilization in diverse applications or platforms.
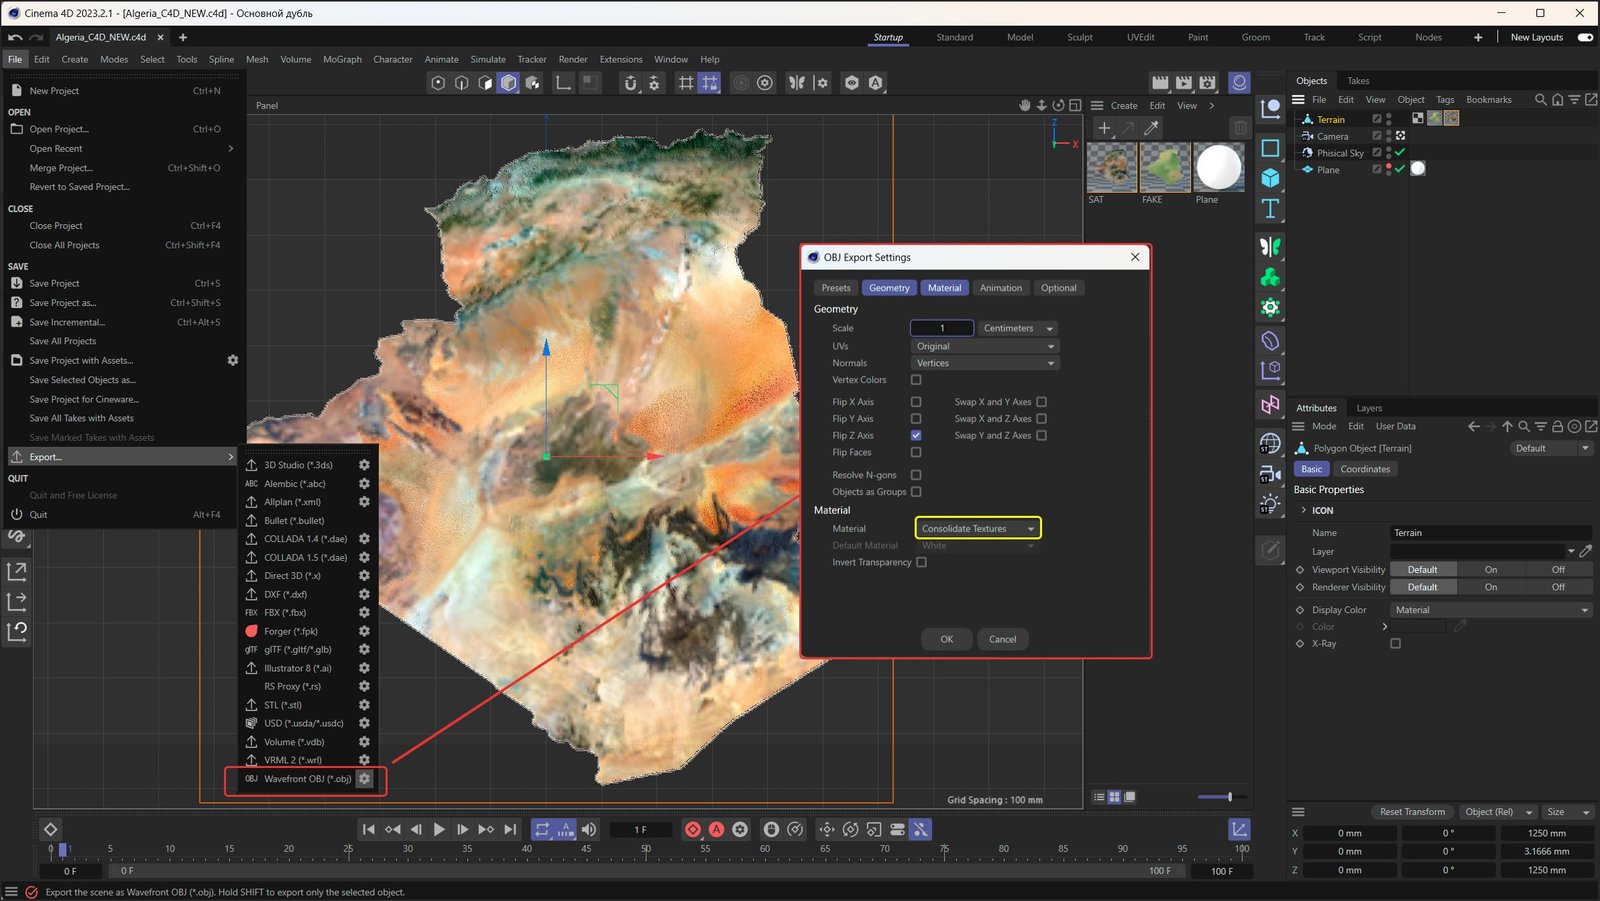
- Select the export format: Once you’ve opened the model in Cinema 4D and refined it by removing unnecessary elements, navigate to the File menu and opt for the Export function.
- Customize export settings: Within the ensuing window, designate the “Wavefront OBJ (*.obj)” format and tailor the export settings to your specifications. This includes configuring units of measurement, choosing options for texture and material preservation, and adjusting other parameters to align with the requirements of your project. Ensure to select the “Consolidate Textures” option.
- Specify path and file name: Define the destination path for saving the OBJ file and assign a suitable file name.
- Initiate the export process: Click on the “Export” or “OK” button to commence exporting the model. Cinema 4D will then proceed to export the model in OBJ format, adhering to the specified parameters.
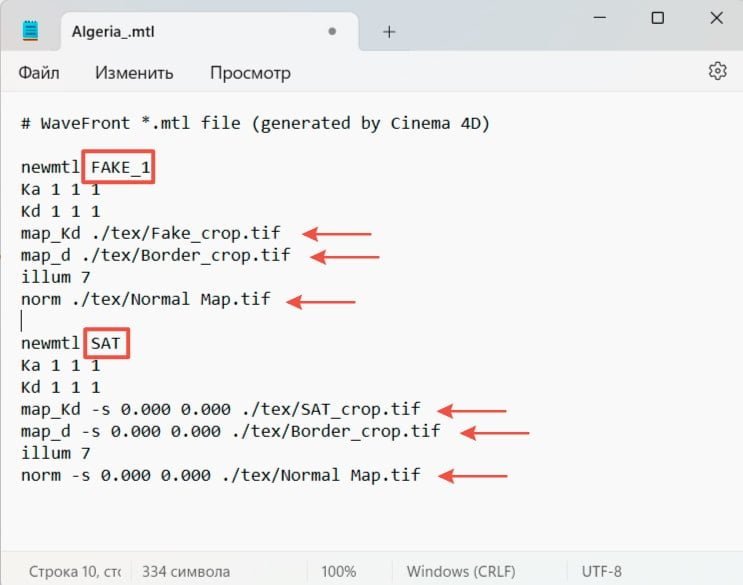
5. Checking OBJ files: Upon completion of the export process, you will encounter two files: an .obj file containing mesh information and an associated .mtl file containing texture details. You can inspect the .mtl file using a text editor to identify the textures utilized in the export and their respective paths. Additionally, you’ll find a “tex” folder where all textures are stored.
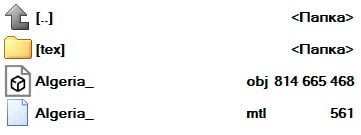
If the “tex” folder is not visible, it’s necessary to create it manually. Subsequently, you should transfer textures from the archive of the purchased C4D model into this folder. Additionally, verify the accuracy of the paths to these textures within the .mtl file.
- Verify the result: To ensure the accuracy of the conversion and preservation process, open the resulting OBJ file in a suitable program or viewer. This step allows you to confirm that the model has been accurately converted and saved, with textures correctly applied.
IMPORT OBJ INTO CINEMA 4D
When converting a model from C4D format to OBJ or FBX formats, several common issues may arise. Below are some of them, along with methods to address them:
- Loss of materials or textures: Occasionally, during the export process to OBJ or FBX formats, materials and textures may either be lost or improperly saved.
For instance, let’s consider importing the previously obtained OBJ file into Cinema 4D.
- Upon importing the OBJ file, ensure that all materials are correctly assigned to the Terrain object. Typically, only one material is automatically assigned. Simply drag the missing materials onto the mesh.
- Double-click on each material to access its properties. If you encounter the message: “Cause: Open connection not implemented: ///tex/…”, click on the folder icon and re-specify the paths to the textures in each channel: Color, Normal, Alpha.
- Disable the Reflectance channel, as earth surfaces typically do not exhibit light reflection.
These steps need to be repeated for each material to ensure proper assignment and texture mapping.
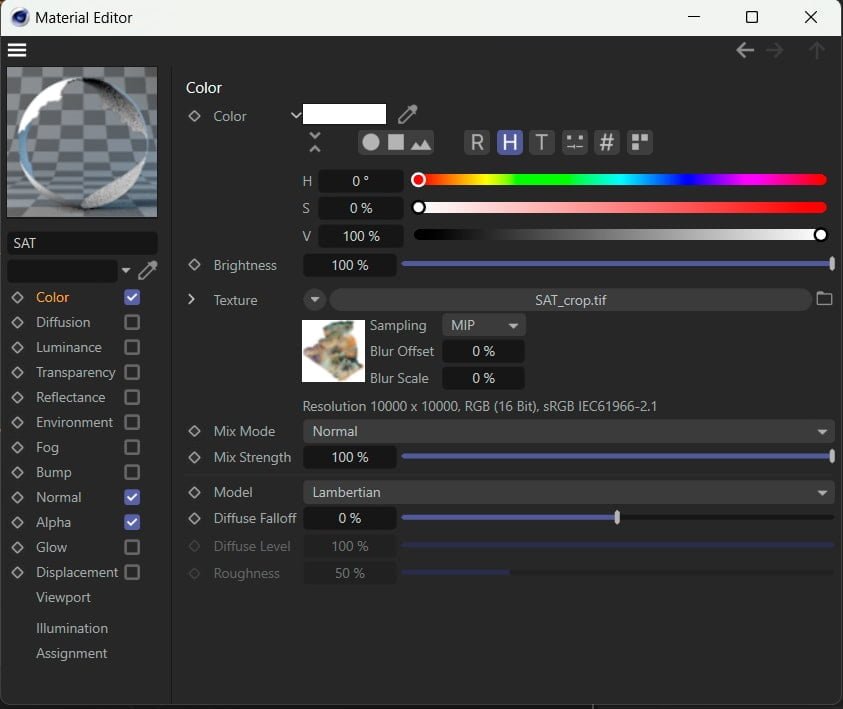
After redefining the path to the texture, a colored thumbnail will be displayed.

Similarly, after updating the path for the Normal Map, a blue thumbnail will appear.

Upon redefining the path for the mask, a black-and-white thumbnail will be visible. If the primary texture still fails to appear, consider inverting the mask.
Now, you can proceed to select the desired relief angle, incorporate the physical sky or other light sources into the scene, and adjust their parameters according to your preferences.
In the render settings, opt for the Physical (or any other available) rendering engine. Integrate a Global Illumination effect and fine-tune the settings accordingly. Finally, initiate the rendering process.

Utilizing a mask simplifies background adjustment. Simply introduce a material with the desired color (e.g., white) and position it in front of the primary materials. This approach yields relief images with a white background.
Alternatively, you can create a plane with the appropriate material and position it beneath the relief.

Exporting to OBJ format streamlines the transfer of models across various programs and platforms, safeguarding the integrity of object geometry and appearance.
IMPORT OBJ INTO BLENDER
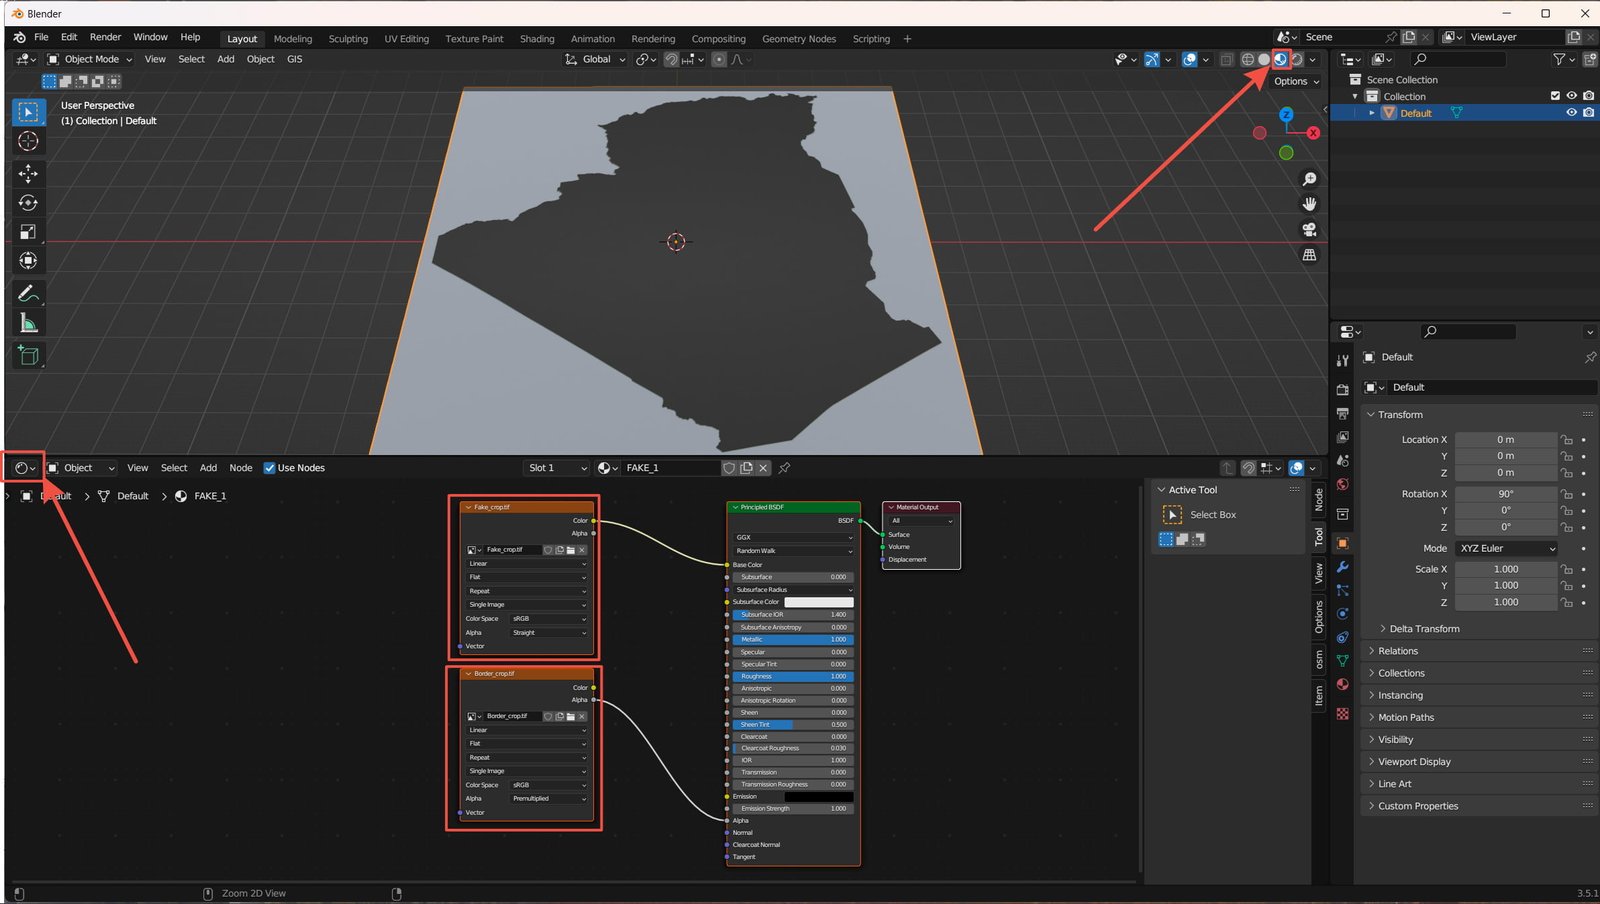
- Import the OBJ file into Blender software.

- Switch to Material Preview mode and open the Shader Editor. You’ll notice that only one Fake texture and a Border mask are connected initially.
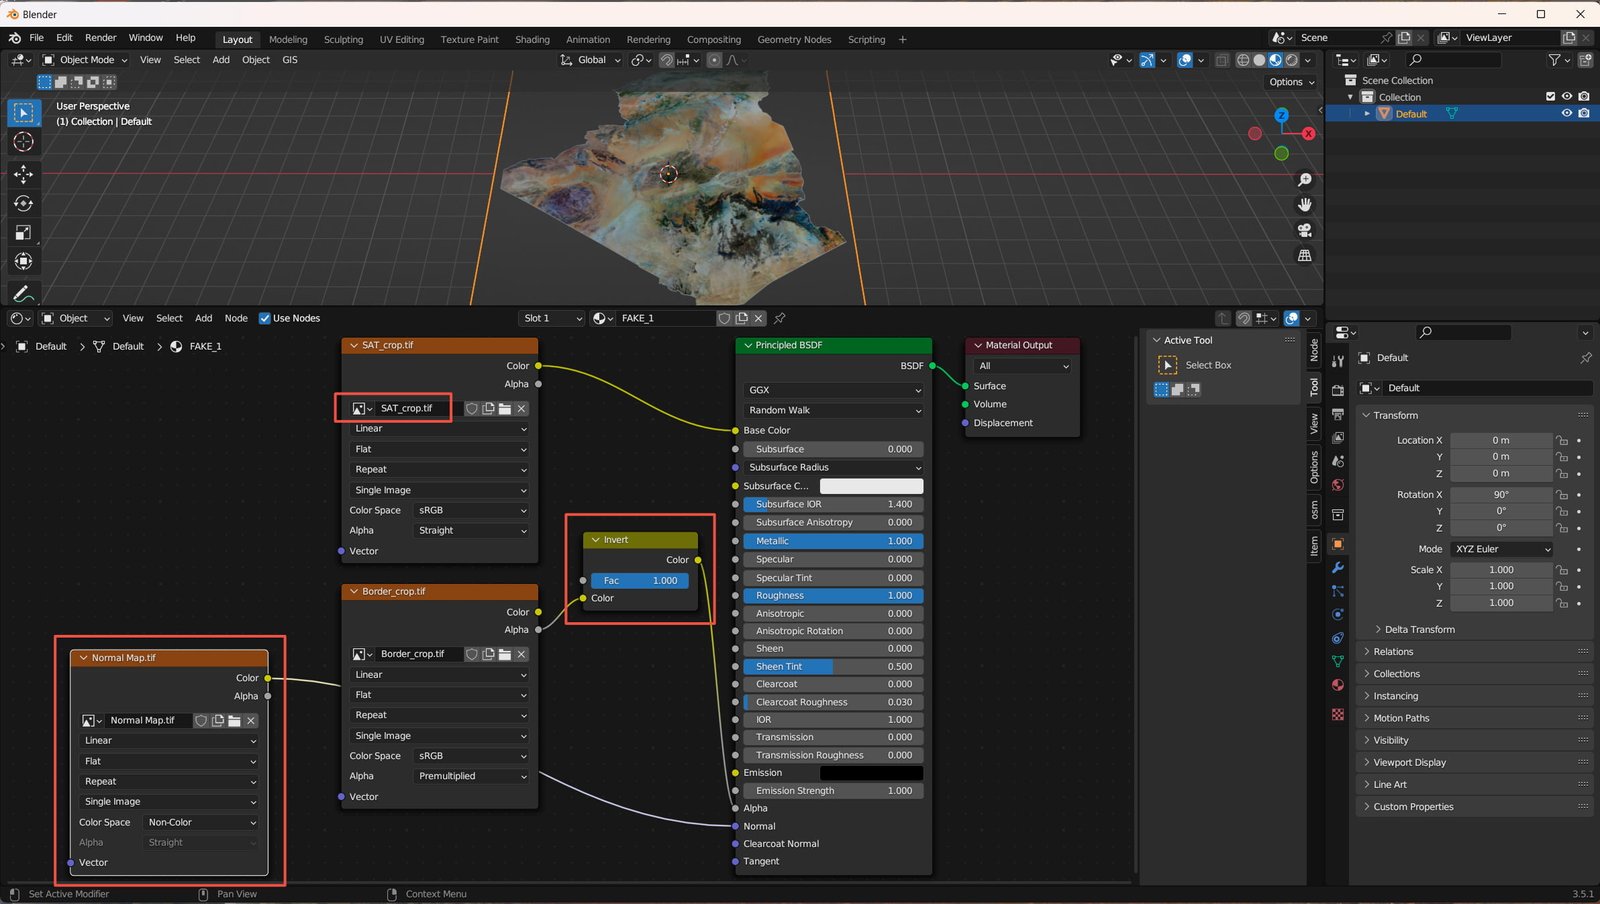
- Additionally, connect the SAT texture or replace the Fake file as needed.
- If you observe an empty space in the center, you’ll need to invert (or disable) the mask. To accomplish this, add an Inverter node.
- Integrate a Normal Map. Ensure to specify the property as “Non-Color” for the normal map.
Now, you can proceed to select the desired relief angle, incorporate the physical sky or other light sources into the scene, and adjust their parameters to your liking.
Configure the render engine according to your requirements and initiate the rendering process.
